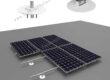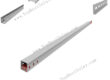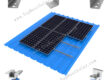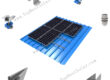
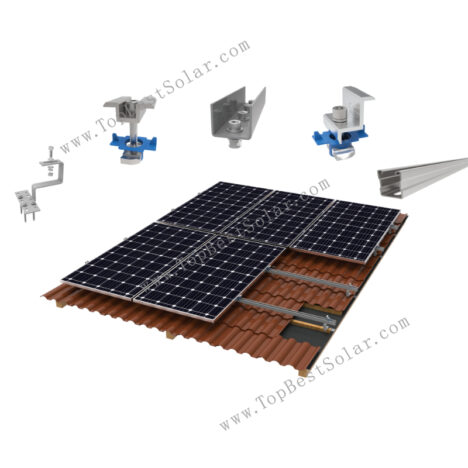
Tile Roof Solar Mounting System
Installation Site: Tile Roof
Material: HDG, S350GD-ZM
Tilt Angle: 0° to 60°
PV Module: Framed, Frameless
PV Orientation: Portrait, Landscape
Wind Load: 60 m/s
Snow Load: 1.6 KN/M2
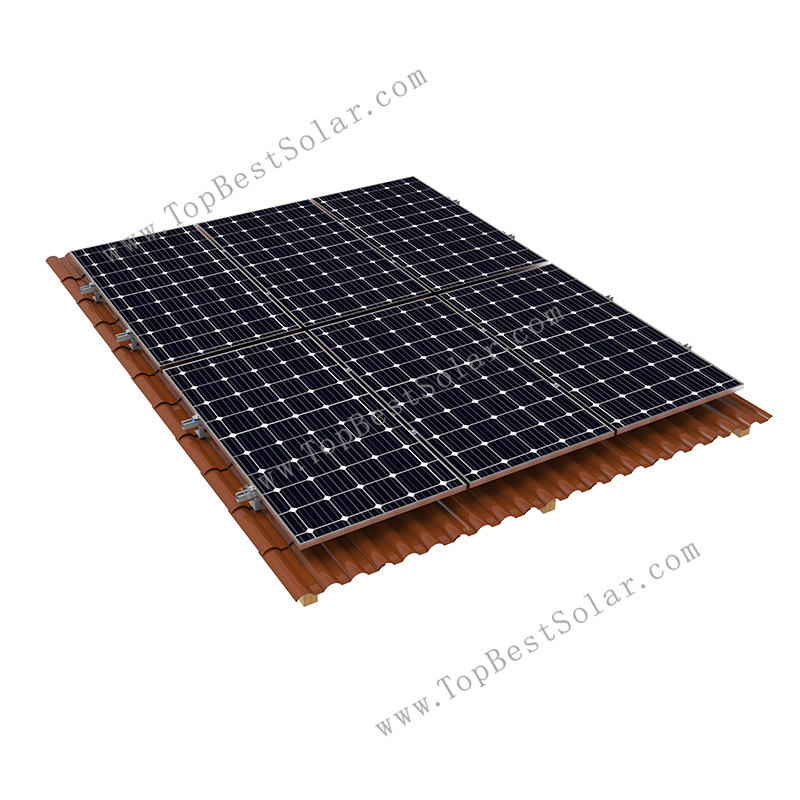
Solar Panel Roof Mounting Bracket — Engineered for Fast, Secure, Cost-Effective Installation
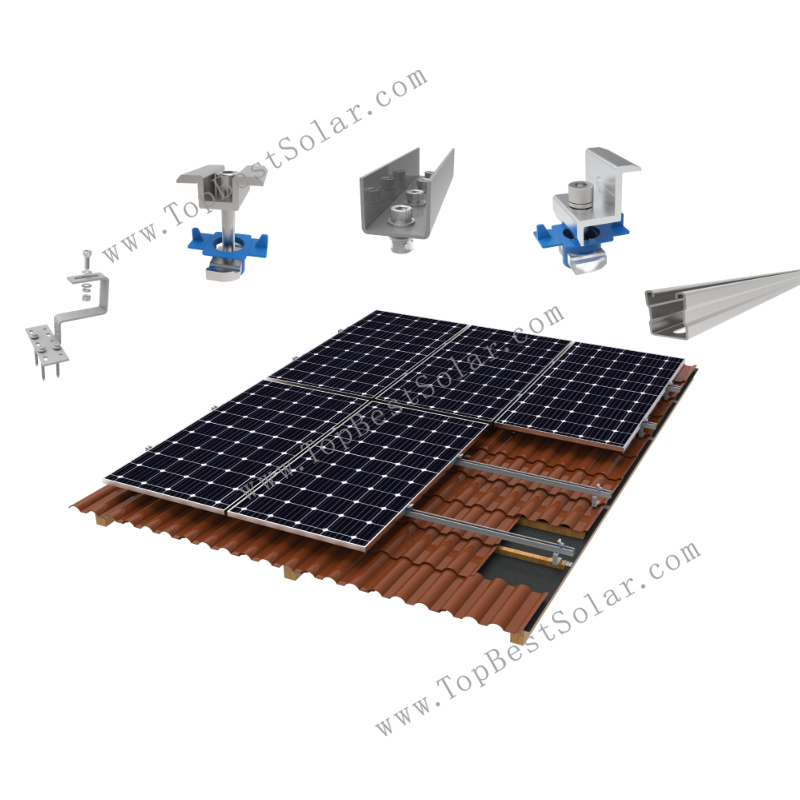
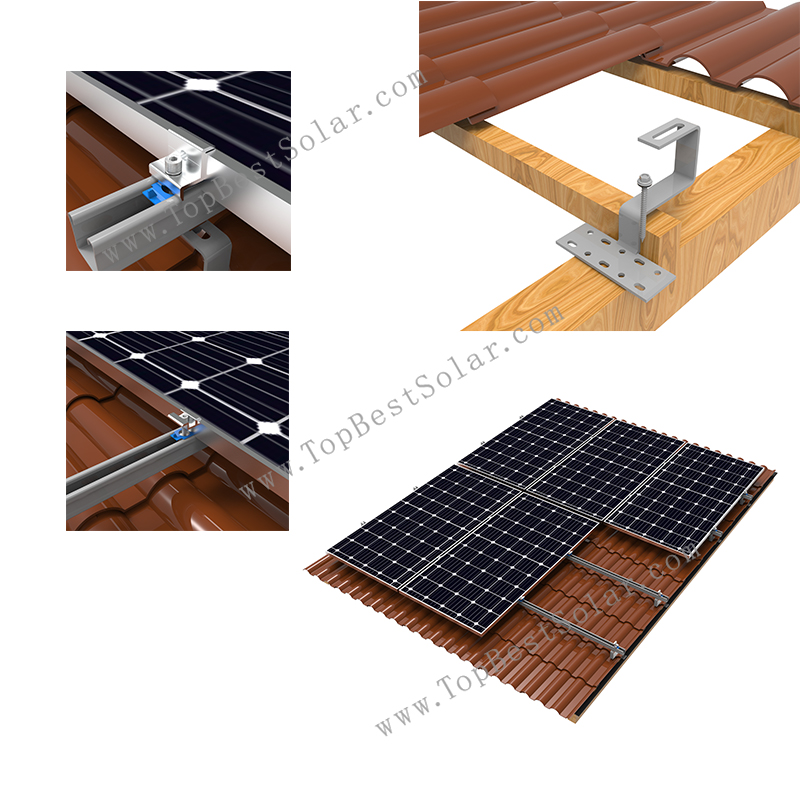
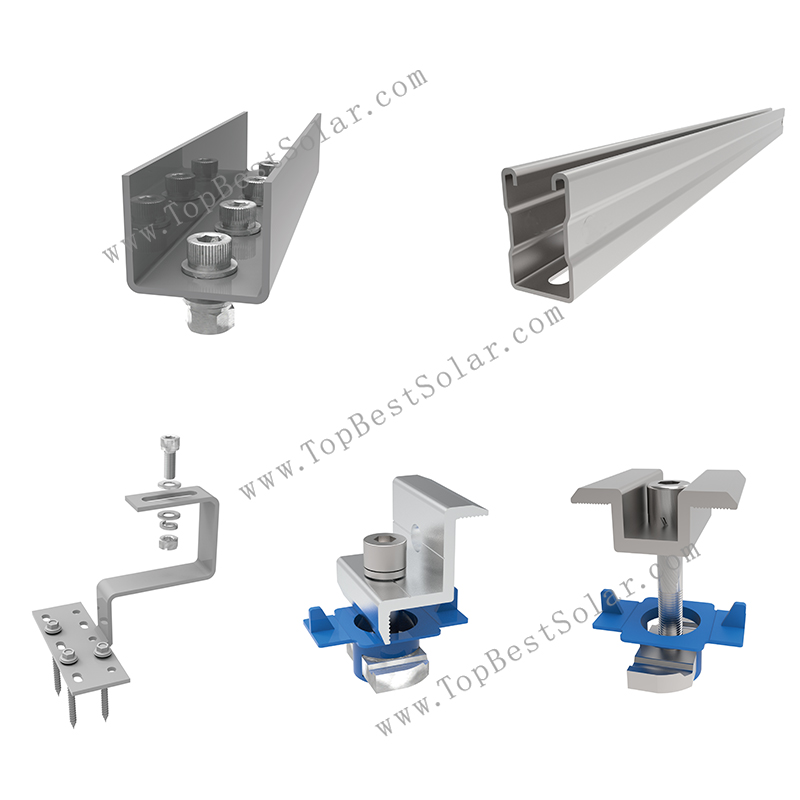
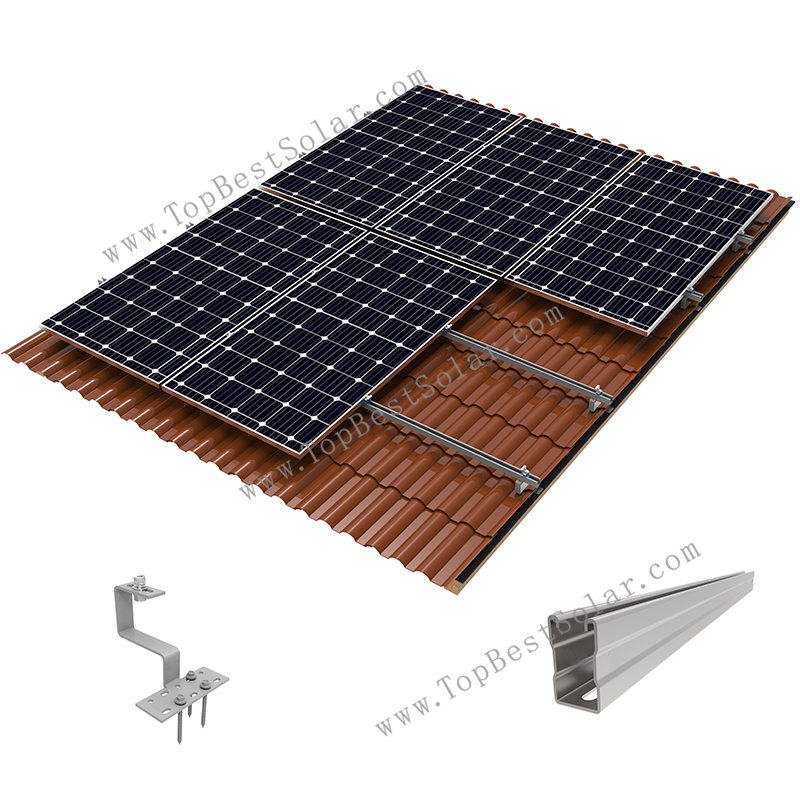
This Solar Panel Roof Mounting Bracket mainly consists of hot-dip galvanized hooks and U rail. It is primarily used to secure a solar panel, ensuring stable installation on tile roof.
Crafted from hot-dip galvanized material, this hook exhibits good acid and oxidation resistance. The simplified installation steps significantly improve construction efficiency, making it a cost-effective choice for rooftop solar projects.
As tile roofs remain one of the most common roofing types for both residential and commercial buildings worldwide, choosing the right mounting solution is critical to a solar project’s long-term performance and safety. Our Solar Panel Roof Mounting Bracket is purpose-built to secure PV modules firmly onto tile roofing without compromising the roof’s waterproofing or structural integrity — giving installers a fast, reliable, and repeatable installation process for every project.
Material & Corrosion Protection
The system is manufactured from hot-dip galvanized steel (HDG) and S350GD-ZM zinc-aluminum-magnesium coated steel. Hot-dip galvanizing forms a metallurgically bonded zinc layer that encapsulates the steel surface, including edges and weld points — the areas most vulnerable to corrosion. The added zinc-aluminum-magnesium (ZM) coating is intended to further improve resistance to salt spray, humidity, and UV exposure.
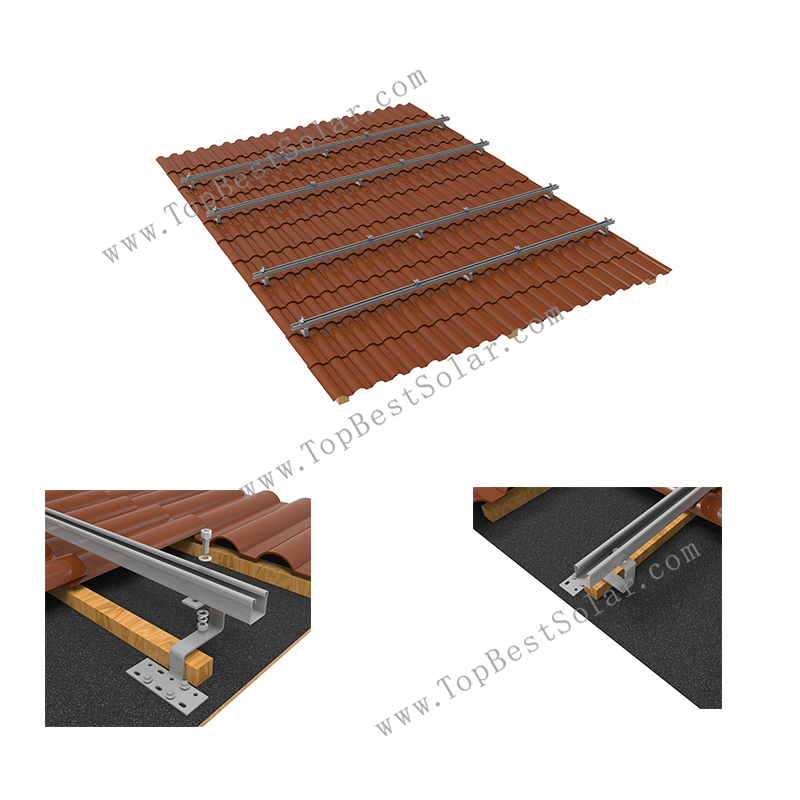
Hooks are designed to sit underneath tiles. All fastening points connect directly to roof rafters, keeping metal fasteners concealed without breaking the original roof drainage layout.
Individual tile‑protection pads are supplied together with each hook set to reduce point‑pressure damage to tile surfaces during installation.
Pre‑assembled component packing reduces on‑site bolt sorting work for installation crews.
Engineering Specifications
- Installation Site: Tile Roof (flat concrete tile, Spanish/barrel tile, interlocking clay tile — see compatibility note below)
- Material: Hot-Dip Galvanized Steel (HDG), S350GD-ZM
- Tilt Angle Range: 0°–60°, accommodating both low-slope and steep tile roofs
- Compatible PV Modules: Framed and frameless
- Panel Orientation: Portrait or landscape
- Wind Load Resistance: up to 60 m/s
- Snow Load Resistance: up to 1.6kN/m²
- Certifications / Standards Compliance:CE
Key Features
- Universal fit for tile roofs— the hook design adapts to a range of common tile profiles without requiring tile modification or drilling in most cases.
- Fast, pre-assembled installation— key components ship pre-assembled, reducing on-site labor time and lowering total installation cost for EPCs and installers.
- Corrosion-resistant by design— HDG + ZM coating is built for multi-decade outdoor exposure with minimal maintenance.
- High cost-performance— engineered to deliver reliable structural performance at a competitive per-watt mounting cost, ideal for residential and light commercial rooftop projects.
- Flexible rail-based architecture— the U-rail and connector system allows continuous rail runs across large roof areas, simplifying array layout and clamp positioning.
System Components
| Component | Function |
| HDG Hook | Anchors to the roof structure beneath the tile, transferring load to the rafter/beam without penetrating the tile itself |
| U Rail | Primary structural rail that carries and distributes the panel load along the roof plane |
| Rail Connector | Joins rail sections for continuous runs across longer roof spans |
| Mid Clamp | Secures adjoining panel edges to the rail |
| End Clamp | Secures the outer edge of the panel array to the rail |
Applications
Suitable for residential and light commercial rooftop systems on tile-roofed structures.
Why Buyers Choose This System
- Packaging,Container-optimized carton/pallet packaging compatible with standard 20ft/40ft ocean freight containers
- Manufactured in our 28,000㎡ facility, supporting both stock and OEM/customized orders
- FOB Xiamen / CIF available; T/T accepted
Contact our team today for a technical datasheet, pricing, and sample availability for your next tile roof solar project.
Installation Steps — Expanded
Step 1 — Prepare Tools and Materials
Before starting, gather all required tools:
- Marker pen
- Wrench / electric screwdriver wrench
- Measuring tape
- Allen key wrench
- Chalk line
- Cutting machine (for rail trimming, if needed)
- Laser rangefinder
Tip: Lay out all hooks, rails, and clamps by roof section beforehand to avoid repeated trips up and down the roof, especially on larger commercial arrays.
Step 2 — Mark and Prepare Hook Installation Points
Locate hook installation points strictly according to the approved construction/layout drawings. Carefully lift or remove the tiles directly above each marked point — avoid unnecessary tile breakage, as damaged tiles compromise the roof’s waterproofing once reset.
Tip: Double-check rafter/beam locations with a stud finder or the roof’s original framing plan before drilling, to ensure the hook anchors into structural wood rather than sheathing alone.
Step 3 — Install the Hooks
Use an electric wrench to fasten each hook firmly onto the wooden beam/rafter, following the spacing specified in the engineering layout. Confirm each hook sits flush and level before moving to the next.
Common mistake to avoid: Over-tightening can strip the wood fastening point; under-tightening leaves the hook loose under wind load. Torque to the fastener manufacturer’s recommended range.
Step 4 — Install Remaining Hooks Per Layout
Continue installing all remaining hooks across the array area as specified in the design scheme, maintaining consistent spacing and alignment across rows.
Tip: Use a chalk line between the first and last hook in a row to keep intermediate hooks aligned — misaligned hooks can introduce stress on the rail once panels are loaded.
Step 5 — Secure the Mounting Rails
Attach the U-rails to the installed hooks using M10×25 bolts and matching fasteners. Ensure rails are level and square to the roof plane before final tightening.
Tip: Leave fasteners slightly loose until the full rail run is positioned, then do a final tightening pass — this makes small alignment adjustments much easier.
Step 6 — Join Rail Sections with Rail Connectors
Where rail runs need to extend beyond a single rail length, join sections using rail connectors. Ensure a tight, flush connection with no gap that could create a weak point under load.
Tip: Stagger rail joints across rows (rather than lining them up) for a more evenly distributed structural load.
Step 7 — Mount Clamps and Secure Panels
Install mid clamps between adjoining panels and end clamps at the outer edges of the array. Tighten all bolts to the specified torque to ensure panels are held securely and evenly.
Tip: Check clamp torque against the panel manufacturer’s frame load tolerance — over-tightening can crack panel frames or glass, particularly on frameless modules.
Step 8 — Final Inspection and Tile Reset
Once all panels are secured, carefully reset the tiles around each hook point, checking for any gaps that could allow water infiltration. Perform a final visual inspection of all bolts, clamps, and hook connections before handover.
Tip: Document hook locations with photos before resetting tiles — this creates a useful reference for future maintenance or panel servicing.
Frequently Asked Questions About Tile Roof Solar Mounting Solutions
Q1: Can this bracket be installed on tile roofs without removing or drilling the tiles?
In most installations, only the tiles directly above the hook mounting point need to be temporarily lifted or removed to access the roof structure beneath — the tile itself is not drilled or permanently modified. This preserves the tile’s waterproofing integrity and allows the tile to be reset around the hook once installation is complete. Roof condition should always be assessed before installation, and any damaged or aging tiles should be repaired first.
Q2: What types of tile roofs is this mounting system compatible with?
The hook and rail system is designed to work across common tile profiles, including flat concrete tile, Spanish/barrel tile, interlocking clay tile. For roofs with non-standard or highly irregular tile profiles, we recommend confirming compatibility with our technical team before ordering.
Q3: What wind and snow load conditions can this system handle?
The system is rated for wind loads up to 60 m/s and snow loads up to 1.6 kN/m². Actual load capacity in a specific installation depends on roof structure, rafter spacing, hook spacing, and local building code requirements — we recommend a site-specific structural assessment for large commercial arrays or high-wind/high-snow regions.
Q4: Does this system work with both framed and frameless solar panels?
Yes. The mid clamp and end clamp components are compatible with both framed and frameless PV modules. Clamp sizing should be confirmed against your specific panel’s frame thickness or glass thickness for frameless modules at the time of order.
Q5: How long does installation typically take?
Because key components — hooks, rail connectors, and clamps — ship pre-assembled, installation time is significantly reduced compared to fully field-assembled systems. Typical crews can complete hook and rail installation for a standard residential array (6–10 panels) within half a day, excluding electrical work.
Q6: Do you support customization OEM/ODM?
We support OEM/ODM customization for hook design, rail length, and coating specification — contact us for details.
Q7: What is included in a complete solar tile roof mounting kit?
A standard kit includes HDG hooks, U rails, rail connectors, mid clamps and end clamps. All parts are pre-assembled for fast on-site installation. You can also purchase individual components based on your project needs.
Q8: Can I use this bracket on a pitched roof or flat roof?
This product is specifically designed for pitched tile roofs. For flat roofs or metal sheet roofs, we offer other dedicated mounting solutions. Please contact us with your roof type for the correct recommendation.
- Description
-
Contact by Email
Solar Panel Roof Mounting Bracket — Engineered for Fast, Secure, Cost-Effective Installation
This Solar Panel Roof Mounting Bracket mainly consists of hot-dip galvanized hooks and U rail. It is primarily used to secure a solar panel, ensuring stable installation on tile roof.
Crafted from hot-dip galvanized material, this hook exhibits good acid and oxidation resistance. The simplified installation steps significantly improve construction efficiency, making it a cost-effective choice for rooftop solar projects.
As tile roofs remain one of the most common roofing types for both residential and commercial buildings worldwide, choosing the right mounting solution is critical to a solar project’s long-term performance and safety. Our Solar Panel Roof Mounting Bracket is purpose-built to secure PV modules firmly onto tile roofing without compromising the roof’s waterproofing or structural integrity — giving installers a fast, reliable, and repeatable installation process for every project.
Material & Corrosion Protection
The system is manufactured from hot-dip galvanized steel (HDG) and S350GD-ZM zinc-aluminum-magnesium coated steel. Hot-dip galvanizing forms a metallurgically bonded zinc layer that encapsulates the steel surface, including edges and weld points — the areas most vulnerable to corrosion. The added zinc-aluminum-magnesium (ZM) coating is intended to further improve resistance to salt spray, humidity, and UV exposure.
Hooks are designed to sit underneath tiles. All fastening points connect directly to roof rafters, keeping metal fasteners concealed without breaking the original roof drainage layout.
Individual tile‑protection pads are supplied together with each hook set to reduce point‑pressure damage to tile surfaces during installation.
Pre‑assembled component packing reduces on‑site bolt sorting work for installation crews.Engineering Specifications
- Installation Site: Tile Roof (flat concrete tile, Spanish/barrel tile, interlocking clay tile — see compatibility note below)
- Material: Hot-Dip Galvanized Steel (HDG), S350GD-ZM
- Tilt Angle Range: 0°–60°, accommodating both low-slope and steep tile roofs
- Compatible PV Modules: Framed and frameless
- Panel Orientation: Portrait or landscape
- Wind Load Resistance: up to 60 m/s
- Snow Load Resistance: up to 1.6kN/m²
- Certifications / Standards Compliance:CE
Key Features
- Universal fit for tile roofs— the hook design adapts to a range of common tile profiles without requiring tile modification or drilling in most cases.
- Fast, pre-assembled installation— key components ship pre-assembled, reducing on-site labor time and lowering total installation cost for EPCs and installers.
- Corrosion-resistant by design— HDG + ZM coating is built for multi-decade outdoor exposure with minimal maintenance.
- High cost-performance— engineered to deliver reliable structural performance at a competitive per-watt mounting cost, ideal for residential and light commercial rooftop projects.
- Flexible rail-based architecture— the U-rail and connector system allows continuous rail runs across large roof areas, simplifying array layout and clamp positioning.
System Components
Component Function HDG Hook Anchors to the roof structure beneath the tile, transferring load to the rafter/beam without penetrating the tile itself U Rail Primary structural rail that carries and distributes the panel load along the roof plane Rail Connector Joins rail sections for continuous runs across longer roof spans Mid Clamp Secures adjoining panel edges to the rail End Clamp Secures the outer edge of the panel array to the rail Applications
Suitable for residential and light commercial rooftop systems on tile-roofed structures.
Why Buyers Choose This System
- Packaging,Container-optimized carton/pallet packaging compatible with standard 20ft/40ft ocean freight containers
- Manufactured in our 28,000㎡ facility, supporting both stock and OEM/customized orders
- FOB Xiamen / CIF available; T/T accepted
Contact our team today for a technical datasheet, pricing, and sample availability for your next tile roof solar project.
- Installation Step
-
Installation Steps — Expanded
Step 1 — Prepare Tools and Materials
Before starting, gather all required tools:
- Marker pen
- Wrench / electric screwdriver wrench
- Measuring tape
- Allen key wrench
- Chalk line
- Cutting machine (for rail trimming, if needed)
- Laser rangefinder
Tip: Lay out all hooks, rails, and clamps by roof section beforehand to avoid repeated trips up and down the roof, especially on larger commercial arrays.
Step 2 — Mark and Prepare Hook Installation Points
Locate hook installation points strictly according to the approved construction/layout drawings. Carefully lift or remove the tiles directly above each marked point — avoid unnecessary tile breakage, as damaged tiles compromise the roof’s waterproofing once reset.
Tip: Double-check rafter/beam locations with a stud finder or the roof’s original framing plan before drilling, to ensure the hook anchors into structural wood rather than sheathing alone.
Step 3 — Install the Hooks
Use an electric wrench to fasten each hook firmly onto the wooden beam/rafter, following the spacing specified in the engineering layout. Confirm each hook sits flush and level before moving to the next.
Common mistake to avoid: Over-tightening can strip the wood fastening point; under-tightening leaves the hook loose under wind load. Torque to the fastener manufacturer’s recommended range.
Step 4 — Install Remaining Hooks Per Layout
Continue installing all remaining hooks across the array area as specified in the design scheme, maintaining consistent spacing and alignment across rows.
Tip: Use a chalk line between the first and last hook in a row to keep intermediate hooks aligned — misaligned hooks can introduce stress on the rail once panels are loaded.
Step 5 — Secure the Mounting Rails
Attach the U-rails to the installed hooks using M10×25 bolts and matching fasteners. Ensure rails are level and square to the roof plane before final tightening.
Tip: Leave fasteners slightly loose until the full rail run is positioned, then do a final tightening pass — this makes small alignment adjustments much easier.
Step 6 — Join Rail Sections with Rail Connectors
Where rail runs need to extend beyond a single rail length, join sections using rail connectors. Ensure a tight, flush connection with no gap that could create a weak point under load.
Tip: Stagger rail joints across rows (rather than lining them up) for a more evenly distributed structural load.
Step 7 — Mount Clamps and Secure Panels
Install mid clamps between adjoining panels and end clamps at the outer edges of the array. Tighten all bolts to the specified torque to ensure panels are held securely and evenly.
Tip: Check clamp torque against the panel manufacturer’s frame load tolerance — over-tightening can crack panel frames or glass, particularly on frameless modules.
Step 8 — Final Inspection and Tile Reset
Once all panels are secured, carefully reset the tiles around each hook point, checking for any gaps that could allow water infiltration. Perform a final visual inspection of all bolts, clamps, and hook connections before handover.
Tip: Document hook locations with photos before resetting tiles — this creates a useful reference for future maintenance or panel servicing.
- FAQ
-
Frequently Asked Questions About Tile Roof Solar Mounting Solutions
Q1: Can this bracket be installed on tile roofs without removing or drilling the tiles?
In most installations, only the tiles directly above the hook mounting point need to be temporarily lifted or removed to access the roof structure beneath — the tile itself is not drilled or permanently modified. This preserves the tile’s waterproofing integrity and allows the tile to be reset around the hook once installation is complete. Roof condition should always be assessed before installation, and any damaged or aging tiles should be repaired first.
Q2: What types of tile roofs is this mounting system compatible with?
The hook and rail system is designed to work across common tile profiles, including flat concrete tile, Spanish/barrel tile, interlocking clay tile. For roofs with non-standard or highly irregular tile profiles, we recommend confirming compatibility with our technical team before ordering.
Q3: What wind and snow load conditions can this system handle?
The system is rated for wind loads up to 60 m/s and snow loads up to 1.6 kN/m². Actual load capacity in a specific installation depends on roof structure, rafter spacing, hook spacing, and local building code requirements — we recommend a site-specific structural assessment for large commercial arrays or high-wind/high-snow regions.
Q4: Does this system work with both framed and frameless solar panels?
Yes. The mid clamp and end clamp components are compatible with both framed and frameless PV modules. Clamp sizing should be confirmed against your specific panel’s frame thickness or glass thickness for frameless modules at the time of order.
Q5: How long does installation typically take?
Because key components — hooks, rail connectors, and clamps — ship pre-assembled, installation time is significantly reduced compared to fully field-assembled systems. Typical crews can complete hook and rail installation for a standard residential array (6–10 panels) within half a day, excluding electrical work.
Q6: Do you support customization OEM/ODM?
We support OEM/ODM customization for hook design, rail length, and coating specification — contact us for details.
Q7: What is included in a complete solar tile roof mounting kit?
A standard kit includes HDG hooks, U rails, rail connectors, mid clamps and end clamps. All parts are pre-assembled for fast on-site installation. You can also purchase individual components based on your project needs.
Q8: Can I use this bracket on a pitched roof or flat roof?
This product is specifically designed for pitched tile roofs. For flat roofs or metal sheet roofs, we offer other dedicated mounting solutions. Please contact us with your roof type for the correct recommendation. - Leave Message
-