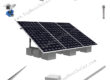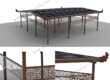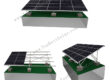

Flat Roof Solar Racking Systems
Installation Site: Ground-Mounted, Flat Roof
Material: S350GD-ZM
Tilt Angle: 0° to 60°
PV Module: Framed, Frameless
PV Orientation: Portrait, Landscape
Wind Load: 60 m/s
Snow Load: 3.6 KN/M2

Product Description:
Our Flat Roof Solar Racking Systems are the ideal solution for commercial and residential flat roof solar projects, constructed from high-performance S350GD-ZM zinc-aluminum-magnesium coated structural steel. S350GD-ZM delivers outstanding corrosion resistance, longer service life than traditional galvanized steel, and excellent mechanical strength to withstand harsh outdoor conditions, including heavy snow, strong winds, and UV exposure.
Features of Flat Roof Solar Racking Systems:
1) Optimized tilt angle design to improve solar energy absorption efficiency.
2) Low maintenance cost, suitable for long-term outdoor rooftop PV installations.
3) Stable structural performance, compliant with international solar mounting standards.
4) High structural strength and stable load-bearing performance to withstand heavy wind, snow and outdoor weathering.
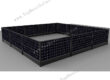
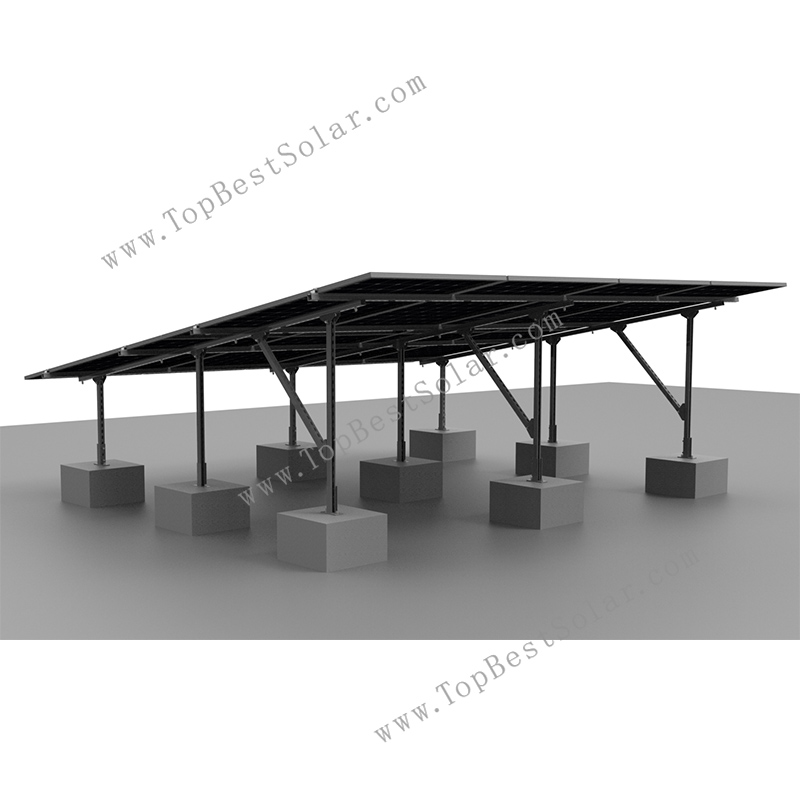
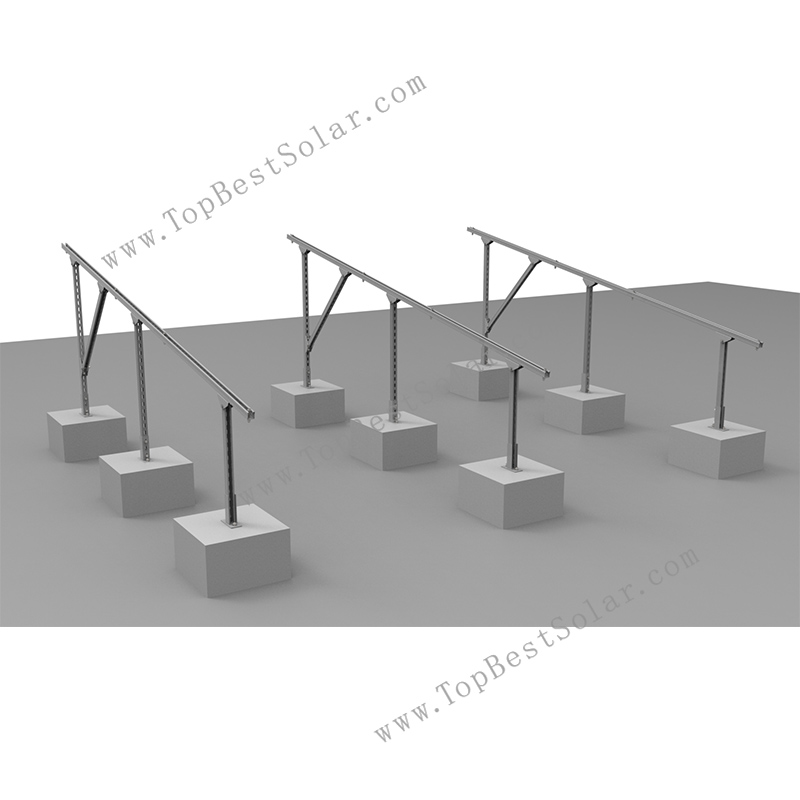
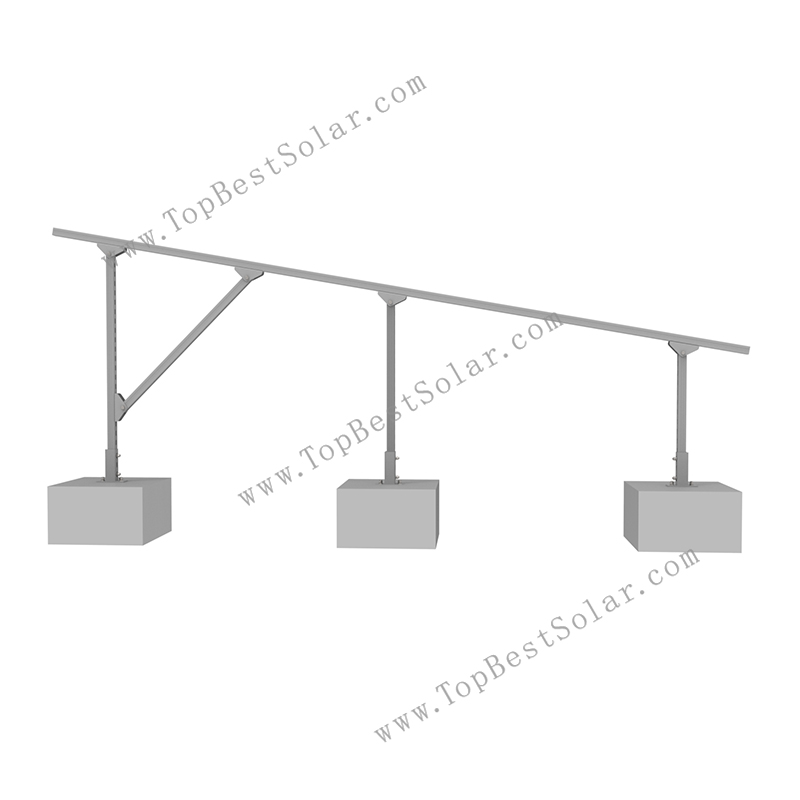
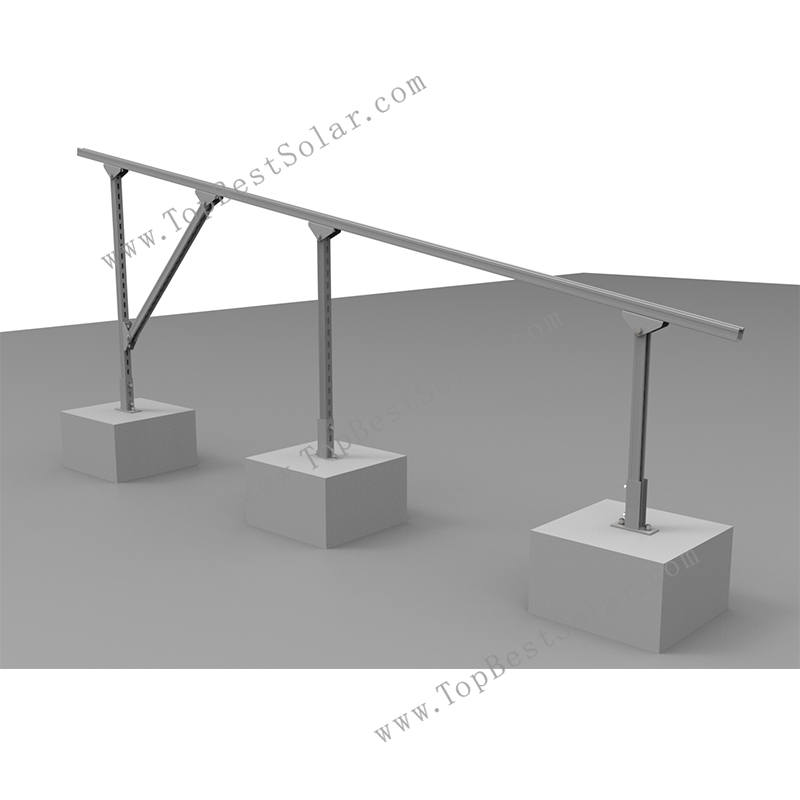
Components of Flat Roof Solar Racking Systems :
1. Concrete Block
2. Mid clamp
3. End clamp
4. Rail Connector
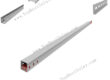
5. U Rail
6. Triangular Connector
7. Base
Our Flat Roof Solar Racking Systems are made of high-strengthzinc‑aluminum‑magnesium steel, featuring excellent corrosion resistance, strong load capacity, easy installation, and long service life. It is stable, durable, and ideal for flat roof PV installations.
Welcome to get more details of our Flat Roof Solar Racking Systems for your renewable energy project from TopBestSolar.com
Concrete Block
Wrench
Allen Key Wrench
Electric Drill
Electric Screwdriver Wrench
Tape Measure
M8 T Wrench
Line of Reference
Cutting Machine
Circular Saw
Hammer
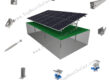
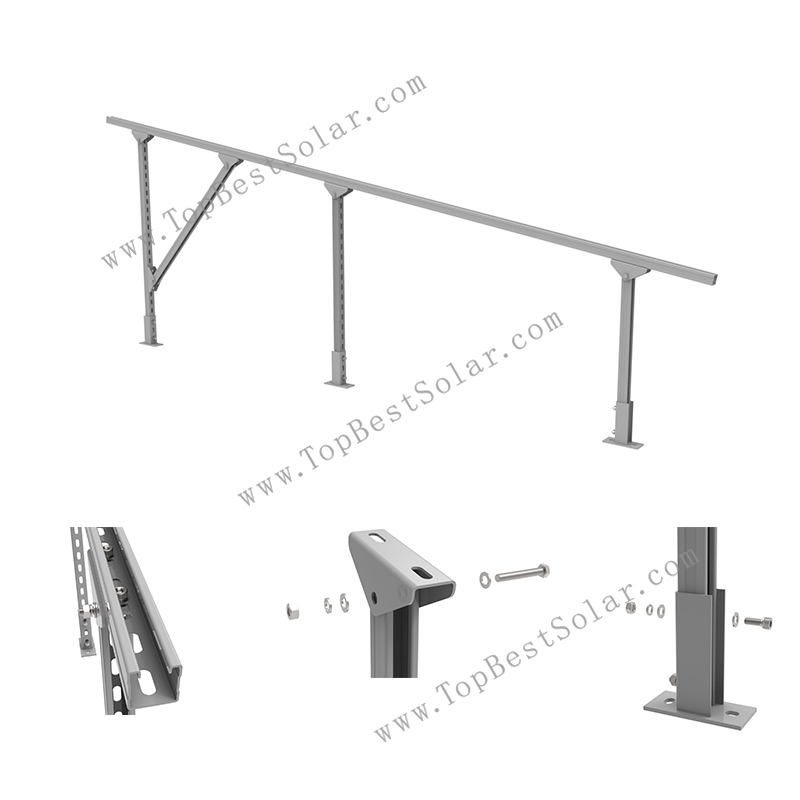
Here are the installation steps for flat roof solar racking systems :
1.Pre-assembled mid clamp and end clamp.
PS: U Rail cutting (front and rear columns as well as bracing) should be carried out according to the drawing dimensions. Try to avoid damaging the existing holes.
The holes at both ends are through holes.
2. Assemble the bracket.
3. Use an electric drill to make holes in the concrete block. The diameter of the holes should be the same as the outer diameter of the anchor bolts, spaced 100mm apart. The holes need to be cleaned thoroughly.
4. Fixed anchor bolt.
5. Install the bracket on the concrete block.
6. Follow the above steps to install the other brackets.
7. Install therail. Secure it with M10*70 bolts.
8. When the rail is not long enough and needs to be connected, use the rail connector for connection.
9. Place mid clamp and end clamp on the rail.
Note: It is safer to install the bolts on the edge of the U rail one notch inward, as the U rail has rectangular holes which allow for adjustable positioning during installation.
Flat Roof Solar Racking Systems Manufacturer
Good day, TBS Team
We are solar energy company in south africa, and we are finding flat roof solar racking system manufacturer.
May you kindly send me east west mounting for flat roof solar racking systems.
Tony
—————————————————————————————————–
Hi
We recommend this flat roof racking systems to you.
Detailed specifications for the system are attached herewith.
Please kindly provide the following information:
The number of solar panels;
The dimensions of the solar panels;
The layout of the panel array.
Looking forward to your reply.
Echo
—————————————————————————————————–
Hi Echo
Thank you for your reply.
Our project will use 92 solar panels. The dimension of panel is 2278*1134*35mm.
Enclosed you can find the layout.
Tony
—————————————————————————————————–
Hi Tony.
Please check this drawing.
Echo

- Description
-
Product Description:
Our Flat Roof Solar Racking Systems are the ideal solution for commercial and residential flat roof solar projects, constructed from high-performance S350GD-ZM zinc-aluminum-magnesium coated structural steel. S350GD-ZM delivers outstanding corrosion resistance, longer service life than traditional galvanized steel, and excellent mechanical strength to withstand harsh outdoor conditions, including heavy snow, strong winds, and UV exposure.
Features of Flat Roof Solar Racking Systems:
1) Optimized tilt angle design to improve solar energy absorption efficiency.
2) Low maintenance cost, suitable for long-term outdoor rooftop PV installations.
3) Stable structural performance, compliant with international solar mounting standards.
4) High structural strength and stable load-bearing performance to withstand heavy wind, snow and outdoor weathering.
Components of Flat Roof Solar Racking Systems :
1. Concrete Block
2. Mid clamp
3. End clamp
4. Rail Connector
5. U Rail
6. Triangular Connector
7. BaseOur Flat Roof Solar Racking Systems are made of high-strengthzinc‑aluminum‑magnesium steel, featuring excellent corrosion resistance, strong load capacity, easy installation, and long service life. It is stable, durable, and ideal for flat roof PV installations.
Welcome to get more details of our Flat Roof Solar Racking Systems for your renewable energy project from TopBestSolar.com
- Installation Instruction
-
Proper installation of flat roof solar racking systems requires the following professional tools to guarantee structural safety and installation accuracy:
Concrete Block
Wrench
Allen Key Wrench
Electric Drill
Electric Screwdriver Wrench
Tape Measure
M8 T Wrench
Line of Reference
Cutting Machine
Circular Saw
HammerHere are the installation steps for flat roof solar racking systems :
1.Pre-assembled mid clamp and end clamp.
PS: U Rail cutting (front and rear columns as well as bracing) should be carried out according to the drawing dimensions. Try to avoid damaging the existing holes.
The holes at both ends are through holes.2. Assemble the bracket.
3. Use an electric drill to make holes in the concrete block. The diameter of the holes should be the same as the outer diameter of the anchor bolts, spaced 100mm apart. The holes need to be cleaned thoroughly.
4. Fixed anchor bolt.
5. Install the bracket on the concrete block.
6. Follow the above steps to install the other brackets.
7. Install therail. Secure it with M10*70 bolts.
8. When the rail is not long enough and needs to be connected, use the rail connector for connection.
9. Place mid clamp and end clamp on the rail.
Note: It is safer to install the bolts on the edge of the U rail one notch inward, as the U rail has rectangular holes which allow for adjustable positioning during installation.
- FAQ
-
Flat Roof Solar Racking Systems Manufacturer
Good day, TBS Team
We are solar energy company in south africa, and we are finding flat roof solar racking system manufacturer.
May you kindly send me east west mounting for flat roof solar racking systems.
Tony
—————————————————————————————————–Hi
We recommend this flat roof racking systems to you.
Detailed specifications for the system are attached herewith.
Please kindly provide the following information:
The number of solar panels;
The dimensions of the solar panels;
The layout of the panel array.Looking forward to your reply.
Echo
—————————————————————————————————–
Hi EchoThank you for your reply.
Our project will use 92 solar panels. The dimension of panel is 2278*1134*35mm.
Enclosed you can find the layout.Tony
—————————————————————————————————–
Hi Tony.Please check this drawing.
Echo
- Leave Message
-