


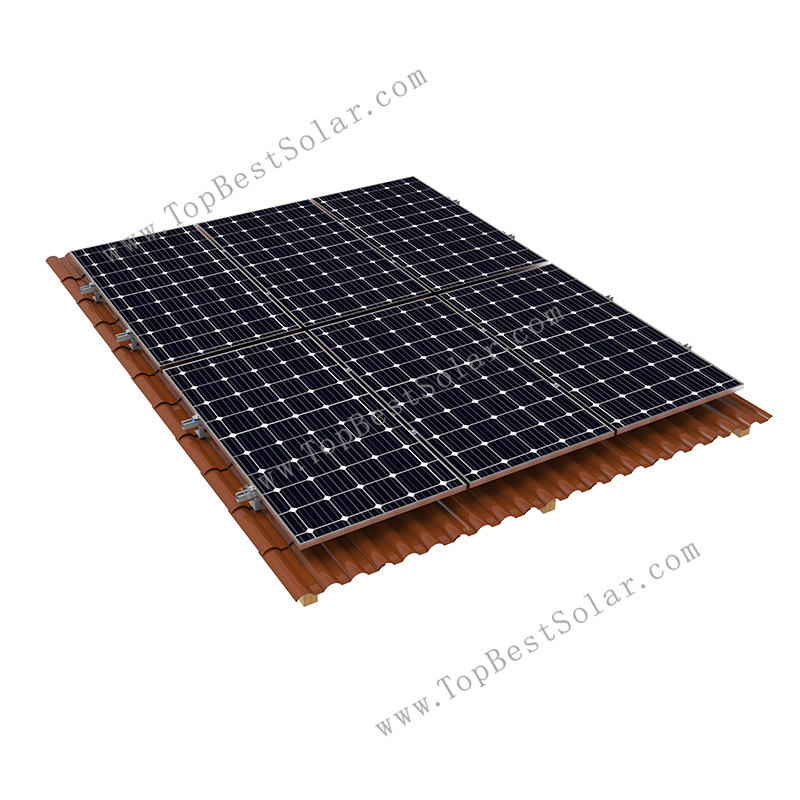
Tile Roof Solar Mounting System
Installation Site: Tile Roof
Material: HDG, S350GD-ZM
Tilt Angle: 0° to 60°
PV Module: Framed, Frameless
PV Orientation: Portrait, Landscape
Wind Load: 60 m/s
Snow Load: 1.4 KN/M2
Product Description:
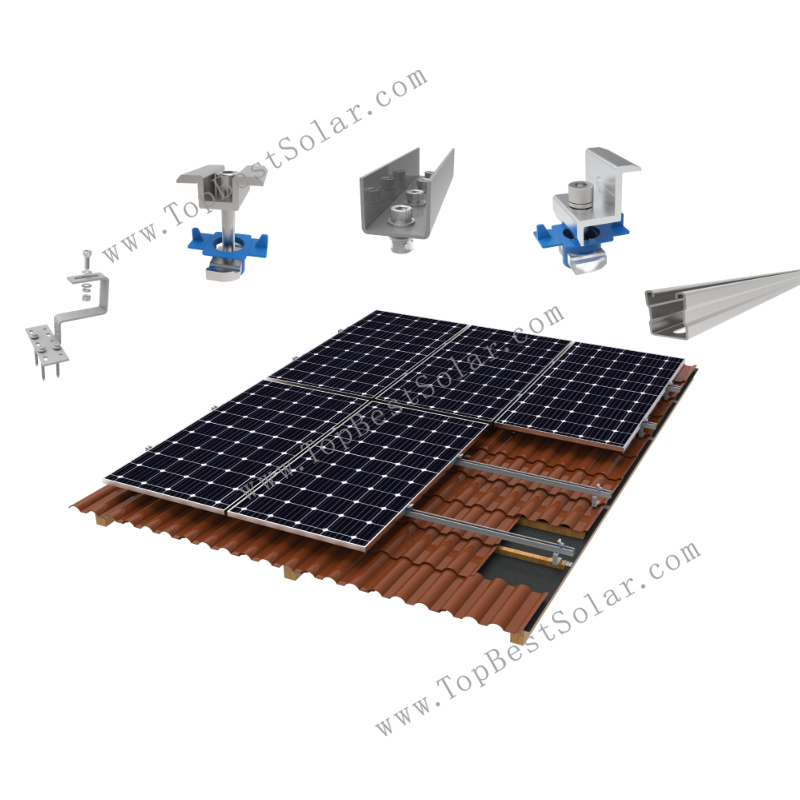
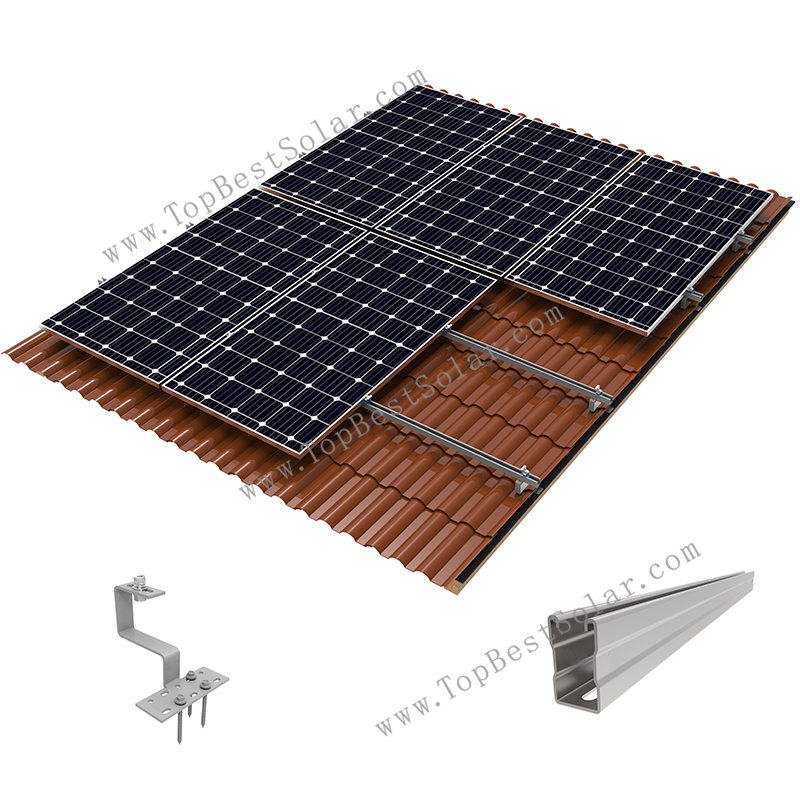
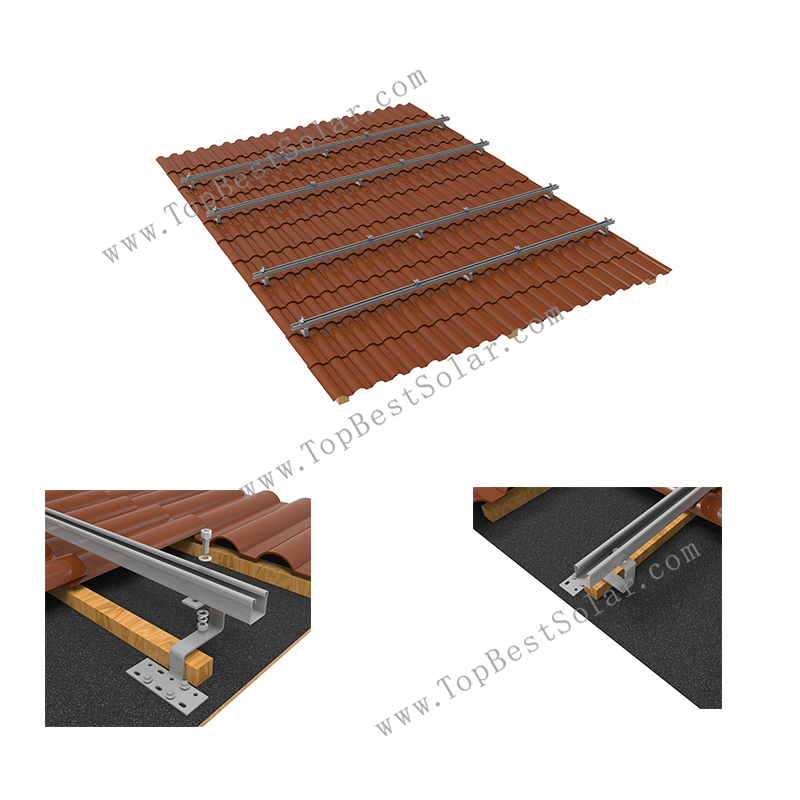
This Solar Panel Roof Mounting Bracket mainly consists of hot-dip galvanized hooks and U rail. It is primarily used to secure a solar panel, ensuring stable installation on tile roof.
Crafted from hot-dip galvanized material with a thickened zinc coating on the surface, this hook exhibit excellent acid resistance and oxidation resistance. The simplified installation steps significantly improve construction efficiency, making it a cost-effective choice for rooftop solar projects.
Features:
1. Universal applied for tile roofs .
2. Easy operation and installation with pre-assembled packing.
3. Quality guarantee with hot-dip galvanized material.
4. Higher cost performance.
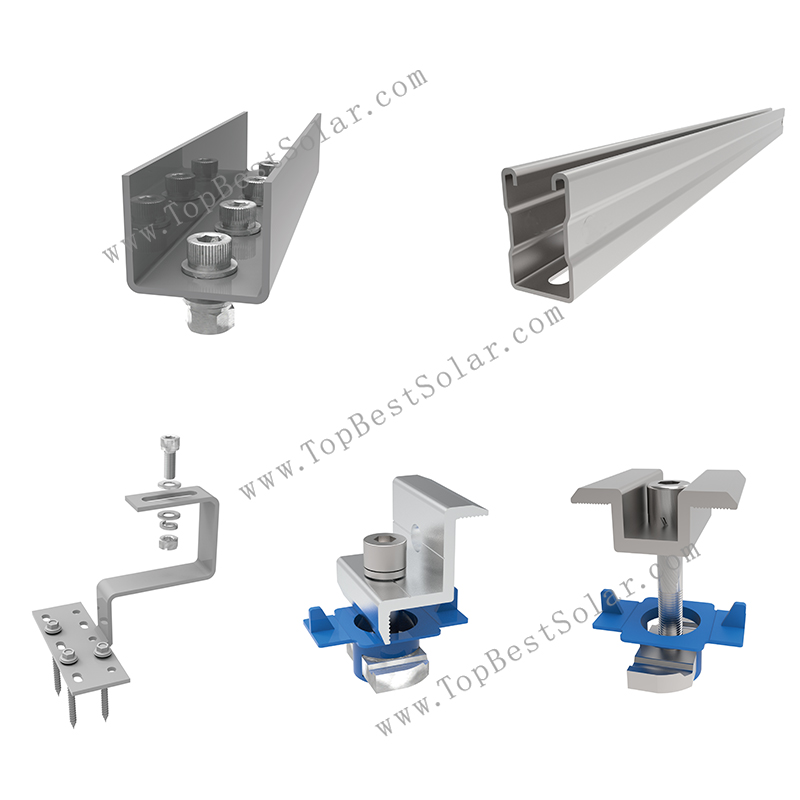
Components for Solar Panel Roof Mounting Bracket :
1. HDG Hook
2. U Rail
3. Rail Connector
4. Mid Clamp
5. End Clamp
A durable, cost-effective tile roof solar mounting solution made of hot-dip galvanized steel and zinc-aluminum-magnesium. It features easy installation with pre-assembled parts, ideal for rooftop solar projects.
Welcome to get more details of our Solar Panel Roof Mounting Bracket for your renewable energy project from www.TopBestSolar.com
- Prepare all necessary tools for solar installation, including the following items:
Marker pen
Wrench / electric screwdriver wrench
Tape
Allen key wrench
Line
Cutting machine
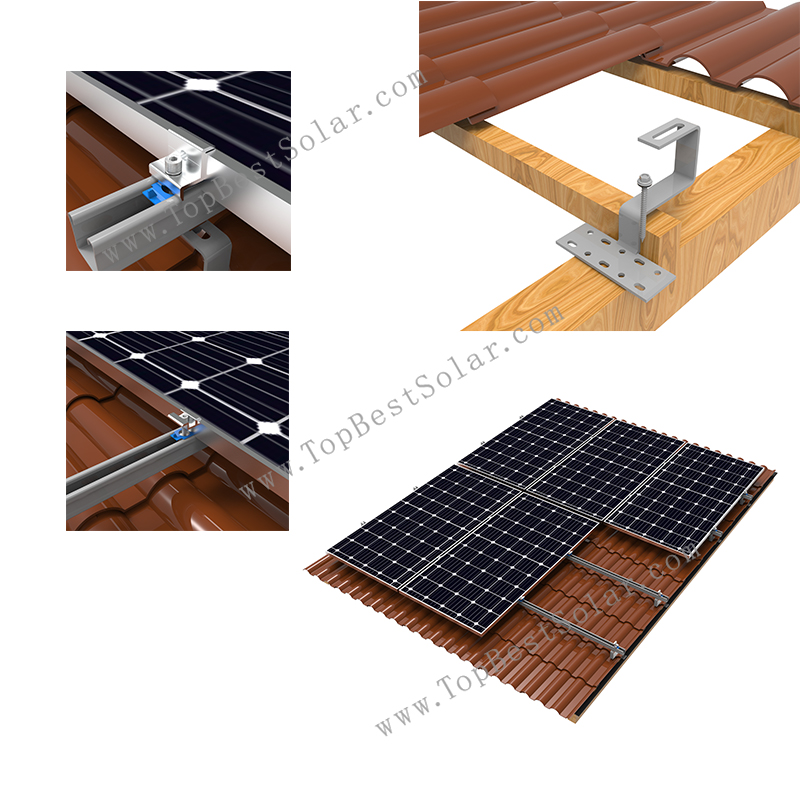
Laser rangefinder - Locate the hook installation points in strict accordance with the construction drawings. Remove the tiles first, then use an electric wrench to fasten the hooks firmly onto the wooden beams.
- Install the rest of the hooks as required by the scheme.
- Secure the mounting rails with M10×25 bolts and other matching fasteners.
- When the rails need to be joined, they should be fixed by using rail connectors.
- Mount mid clamps and end clamps onto the installed rails.
- Tighten all relevant bolts to fix the solar panels stably, and the entire installation work is completed.
- Description
-
Product Description:
This Solar Panel Roof Mounting Bracket mainly consists of hot-dip galvanized hooks and U rail. It is primarily used to secure a solar panel, ensuring stable installation on tile roof.
Crafted from hot-dip galvanized material with a thickened zinc coating on the surface, this hook exhibit excellent acid resistance and oxidation resistance. The simplified installation steps significantly improve construction efficiency, making it a cost-effective choice for rooftop solar projects.
Features:
1. Universal applied for tile roofs .
2. Easy operation and installation with pre-assembled packing.
3. Quality guarantee with hot-dip galvanized material.
4. Higher cost performance.Components for Solar Panel Roof Mounting Bracket :
1. HDG Hook
2. U Rail
3. Rail Connector
4. Mid Clamp
5. End ClampA durable, cost-effective tile roof solar mounting solution made of hot-dip galvanized steel and zinc-aluminum-magnesium. It features easy installation with pre-assembled parts, ideal for rooftop solar projects.
Welcome to get more details of our Solar Panel Roof Mounting Bracket for your renewable energy project from www.TopBestSolar.com
- Installation Step
-
- Prepare all necessary tools for solar installation, including the following items:
Marker pen
Wrench / electric screwdriver wrench
Tape
Allen key wrench
Line
Cutting machine
Laser rangefinder - Locate the hook installation points in strict accordance with the construction drawings. Remove the tiles first, then use an electric wrench to fasten the hooks firmly onto the wooden beams.
- Install the rest of the hooks as required by the scheme.
- Secure the mounting rails with M10×25 bolts and other matching fasteners.
- When the rails need to be joined, they should be fixed by using rail connectors.
- Mount mid clamps and end clamps onto the installed rails.
- Tighten all relevant bolts to fix the solar panels stably, and the entire installation work is completed.
- Prepare all necessary tools for solar installation, including the following items:
- Leave Message
-