


Solar Shingle Roof Mounts
Model: SPC-RF-IK13-DR
Installation Site: Shingle Roofing
Material: SUS304, 6005-T5 Alum
Tilt Angle: 0° to 45°
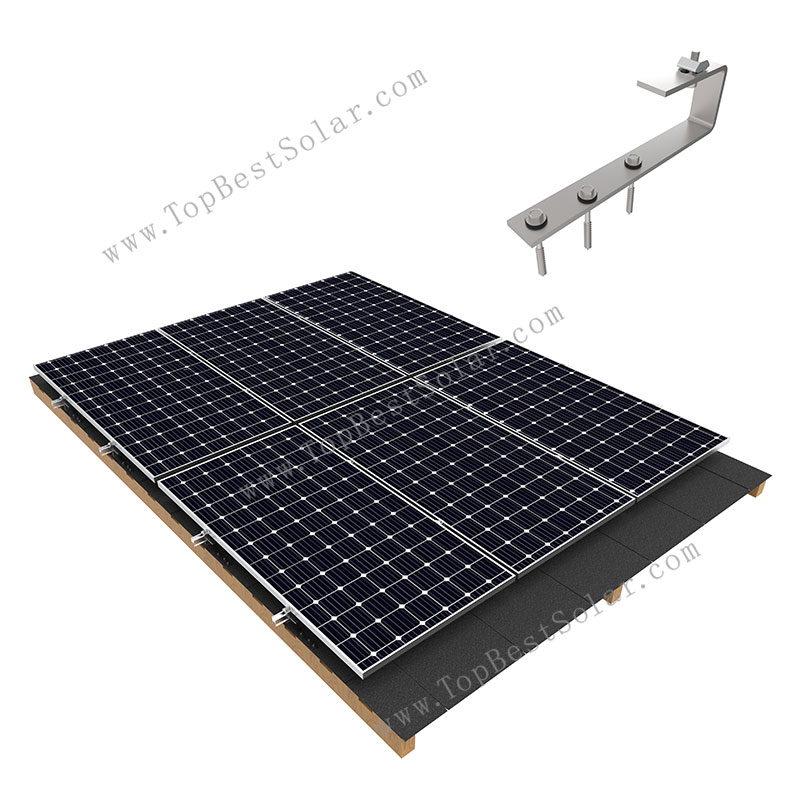
PV Module: Framed, Frameless
PV Orientation: Portrait, Landscape
Wind Load: 60 m/s
Snow Load: 1.4 KN/M2

Product Description:
Shingle roofing is an ideal rooftop for pv module installation.
Our mounting SPC-RF-IK13-DR serial is engineered for slope shingle roofing from desigh to fabrication.
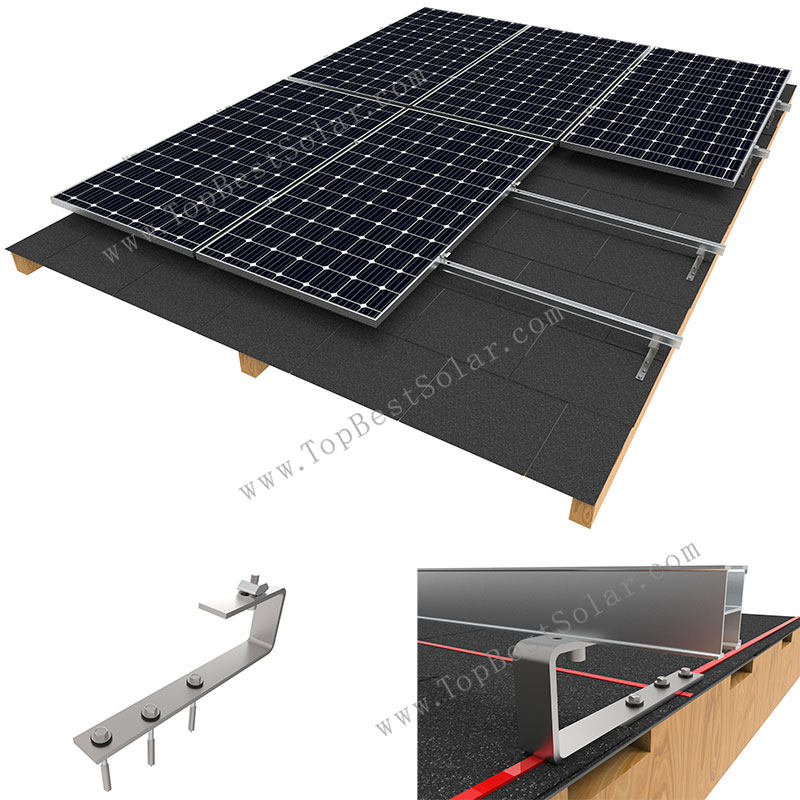
The whole racking kits for shingle roofing includes: aluminum profiles, sus304 bottom mounted bracket, lag screws with rubber gasket washer …
Features of solar panel shingle roof mounting system:
1) Easy to install PV modules on shingle roofs;
2) Watertight feature;
3) Be used for aluminum flashing optional;
4) Stainless steel bracket (SPC-RF-IK13) included;
System components for solar shingle roof mounts SPC-RF-IK13-DR:
1. Shingle Roof Hooks model: SPC-RF-IK13;
2. Mid clamp;
3. End clamp;
4. Rail splice;
5. H-rail alloy;
There is no need to cutting or distroting shingle tiles with our solar panel shingle roof racking kits.
It very easy to save and make money on shingle rooftop equipping with solar power plant.
The electricity energy can be used for heating, hot-water, lighting and other appliances.
Welcome to get more details of our shingle tile solar mounts (Model: SPC-RF-IK13-DR) for your renewable energy project from www.TopBestSolar.com
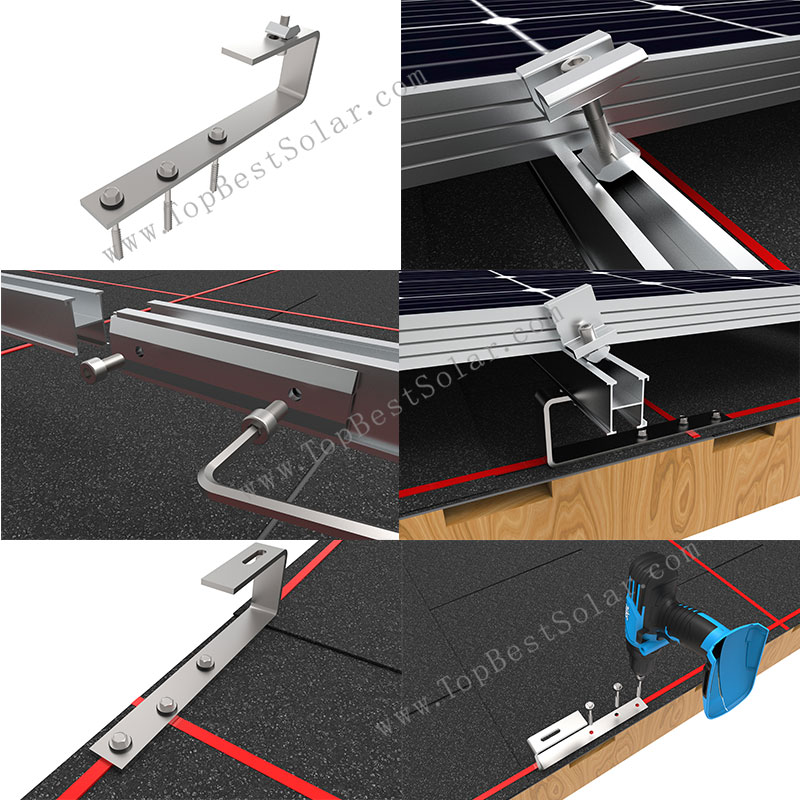
Installation instructions for solar panel shingle roofing mounts with bracket SPC-RF-IK13-DR:
The roof hook for shingle rooftop is made of stainless steel, corrosion-resistant and beautiful in appearance. The H-shape rail is made of aluminum alloy, and the surface is anodized, which is not easy to corrode and is light in weight. The overall mounting components are few, and the installation is simple and convenient. The Small Components are pre-assembled in the factory, which saves assembly time and labor costs on site. Before installing the system, please read the following installation instructions carefully.
Stainless steel hook installation steps:
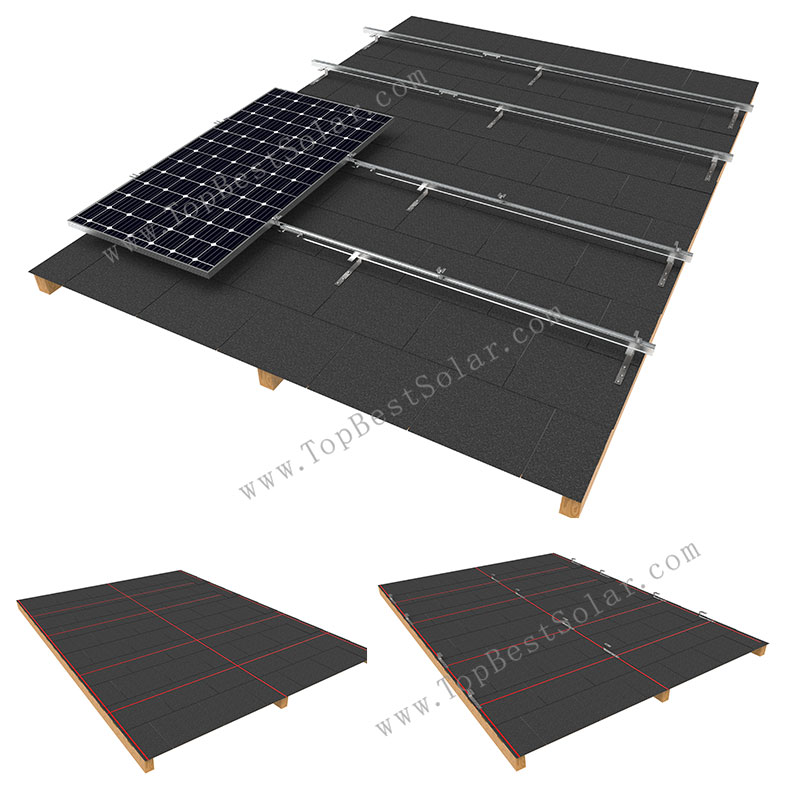
1.1 Clean the asphalt shingle roof, and according to the site construction drawings, draw a line at the installation position of the main beam hook of the asphalt shingle, as picture 1 shows.
1.2 Put the stainless steel hook #13 on the installation position of the main beam, and fix the hook with three wood screws (ST6.3 * 80), as picture 2 shows. After installation ,as picture 3 shows.
1.3 According to step 2, fix all the remaining stainless steel hooks on the main beam according to the drawings. After installation, as picture 4 shows.
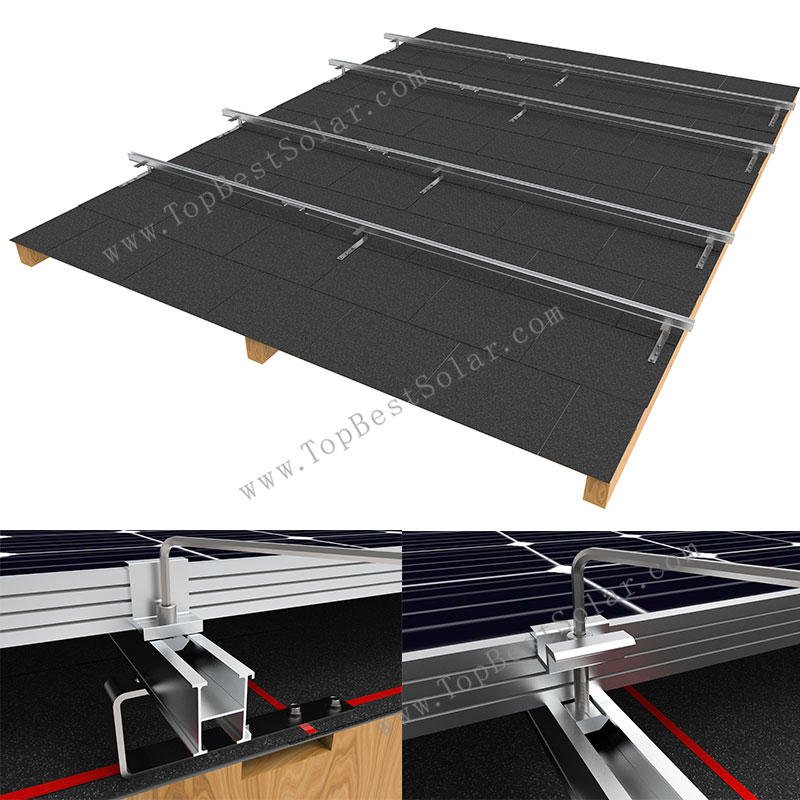
1.4 Use M8*25 clamp and bolts to install the H-rail on the stainless steel hook #13. As picture 5 shows.
1.5 Effect after installation.
1.6 Use the rail splice for the connection between the rail and the rail, Insert the connector into the groove behind the rail, insert 75mm on each side, and then lock the bolts, as picture
1.7 According to the above steps, connect the rails with rail splice first, and then install the rails on the hooks according to the construction drawings. After all the rails are installed, as
1.8 Put the panel vertically on the two rails, the installation sequence can be from left to right, from bottom to top, first press the solar panel by hand to prevent the panel from sliding
1.9 Use the end clamp to lock the side of panel, screw the clamp block on the mid clamp to the bottom of the bolt, and then put it sideways into the groove of the rail, as shown in
2.0 The installation of the mid clamp is the same as that of the end clamp. First, screw the sliding nut on the mid clamp to the bottom of the bolt, and then put it sideways into the groove of the rail. After install the mid clamp.
2.1 According to the above steps, use the mid clamp to install the panels from left to right.
2.2 After the overall installation.
- Description
-
Product Description:
Shingle roofing is an ideal rooftop for pv module installation.
Our mounting SPC-RF-IK13-DR serial is engineered for slope shingle roofing from desigh to fabrication.
The whole racking kits for shingle roofing includes: aluminum profiles, sus304 bottom mounted bracket, lag screws with rubber gasket washer …
Features of solar panel shingle roof mounting system:
1) Easy to install PV modules on shingle roofs;
2) Watertight feature;
3) Be used for aluminum flashing optional;
4) Stainless steel bracket (SPC-RF-IK13) included;
System components for solar shingle roof mounts SPC-RF-IK13-DR:
1. Shingle Roof Hooks model: SPC-RF-IK13;
2. Mid clamp;
3. End clamp;
4. Rail splice;
5. H-rail alloy;There is no need to cutting or distroting shingle tiles with our solar panel shingle roof racking kits.
It very easy to save and make money on shingle rooftop equipping with solar power plant.
The electricity energy can be used for heating, hot-water, lighting and other appliances.
Welcome to get more details of our shingle tile solar mounts (Model: SPC-RF-IK13-DR) for your renewable energy project from www.TopBestSolar.com
- Installation
-
Installation instructions for solar panel shingle roofing mounts with bracket SPC-RF-IK13-DR:
The roof hook for shingle rooftop is made of stainless steel, corrosion-resistant and beautiful in appearance. The H-shape rail is made of aluminum alloy, and the surface is anodized, which is not easy to corrode and is light in weight. The overall mounting components are few, and the installation is simple and convenient. The Small Components are pre-assembled in the factory, which saves assembly time and labor costs on site. Before installing the system, please read the following installation instructions carefully.
Stainless steel hook installation steps:
1.1 Clean the asphalt shingle roof, and according to the site construction drawings, draw a line at the installation position of the main beam hook of the asphalt shingle, as picture 1 shows.
1.2 Put the stainless steel hook #13 on the installation position of the main beam, and fix the hook with three wood screws (ST6.3 * 80), as picture 2 shows. After installation ,as picture 3 shows.
1.3 According to step 2, fix all the remaining stainless steel hooks on the main beam according to the drawings. After installation, as picture 4 shows.
1.4 Use M8*25 clamp and bolts to install the H-rail on the stainless steel hook #13. As picture 5 shows.
1.5 Effect after installation.
1.6 Use the rail splice for the connection between the rail and the rail, Insert the connector into the groove behind the rail, insert 75mm on each side, and then lock the bolts, as picture
1.7 According to the above steps, connect the rails with rail splice first, and then install the rails on the hooks according to the construction drawings. After all the rails are installed, as
1.8 Put the panel vertically on the two rails, the installation sequence can be from left to right, from bottom to top, first press the solar panel by hand to prevent the panel from sliding
1.9 Use the end clamp to lock the side of panel, screw the clamp block on the mid clamp to the bottom of the bolt, and then put it sideways into the groove of the rail, as shown in
2.0 The installation of the mid clamp is the same as that of the end clamp. First, screw the sliding nut on the mid clamp to the bottom of the bolt, and then put it sideways into the groove of the rail. After install the mid clamp.
2.1 According to the above steps, use the mid clamp to install the panels from left to right.
2.2 After the overall installation.
- Leave Message
-