


Solar Panel Roof Mounting System
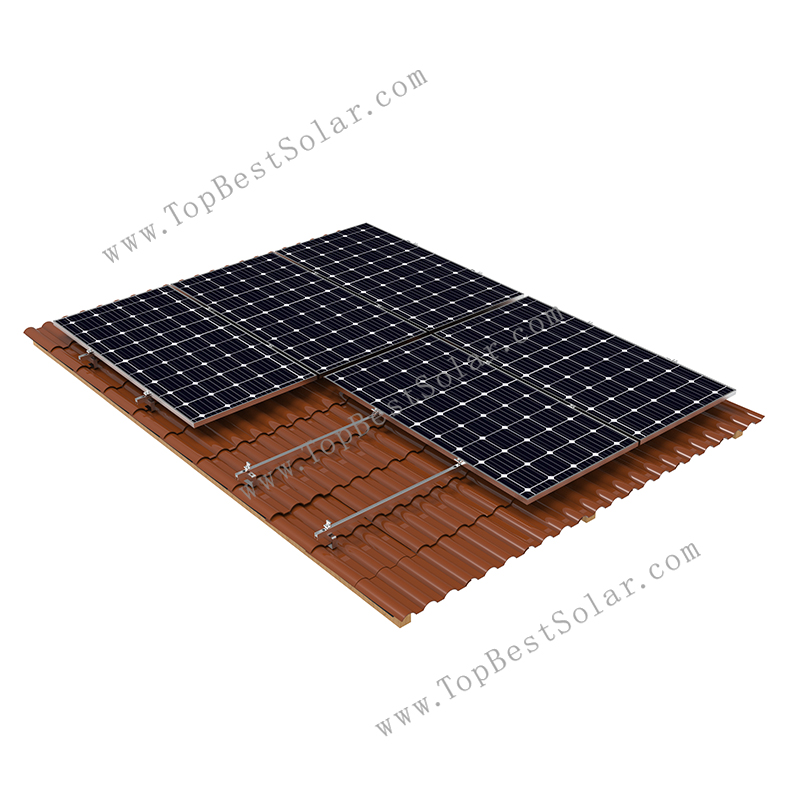
Installation Site: Tile Roof
Material: SUS304, AL6005-T5
Tilt Angle: 0° to 60°
PV Module: Framed, Frameless
PV Orientation: Portrait, Landscape
Wind Load: 60 m/s
Snow Load: 1.4 KN/M2
Product Description:
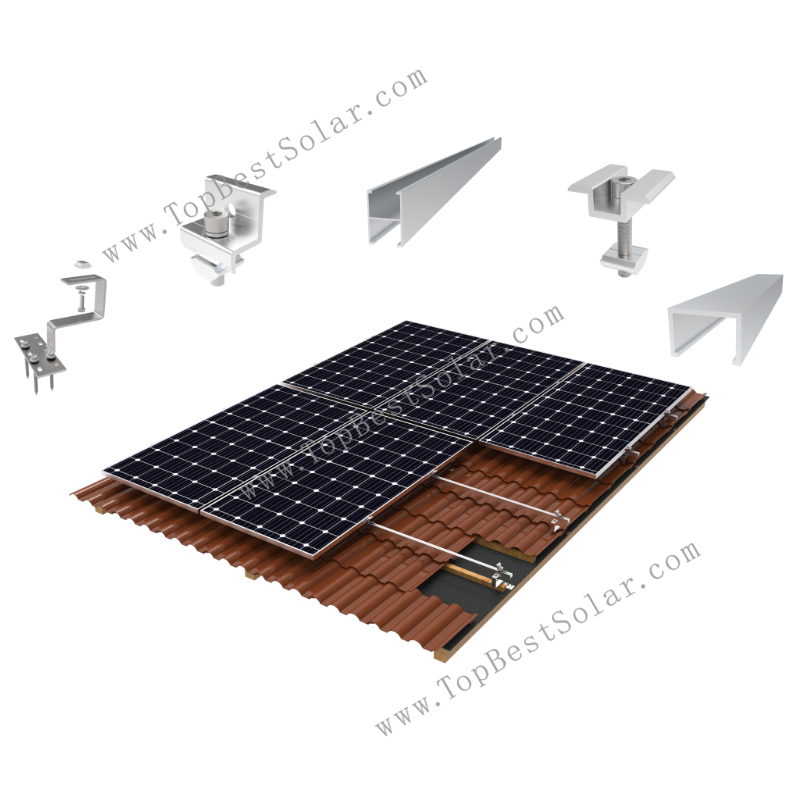
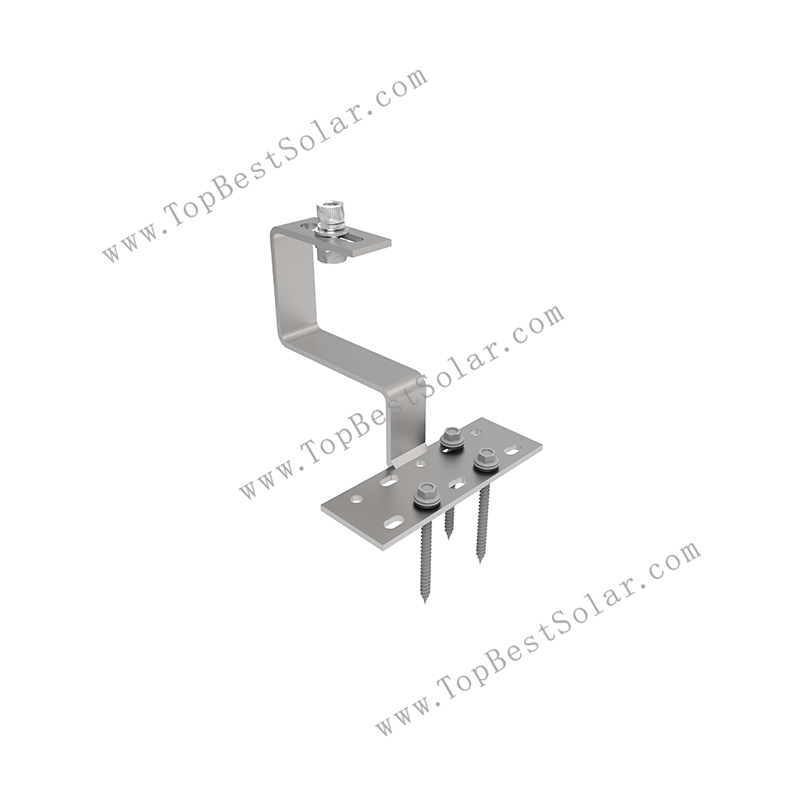
This system is tailored for tile roofs. SUS304 hook with aluminum H rail, which is primarily used to secure solar panel, ensuring stable installation on tile roof.
Made from SUS304 and aluminum material, this system has superior corrosion resistance and high strength. Featuring flexible installation, it can be quickly assembled via bolt connection without the need for drilling or welding, thus avoiding any damage to the roof structure.
Features of Solar Panel Roof Mounting System:
1) Universal used for tile roof
2) Easy operation and installation with pre-assembled packing.
3) Qualty guarantee with good quallty SUS304 material.
Components for Solar Panel Roof Mounting System:
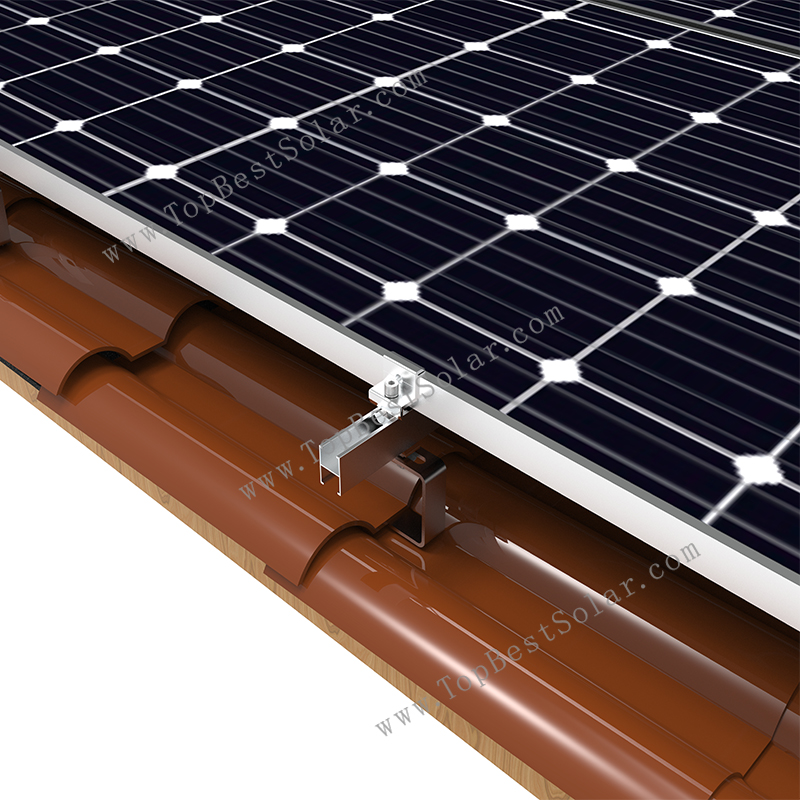
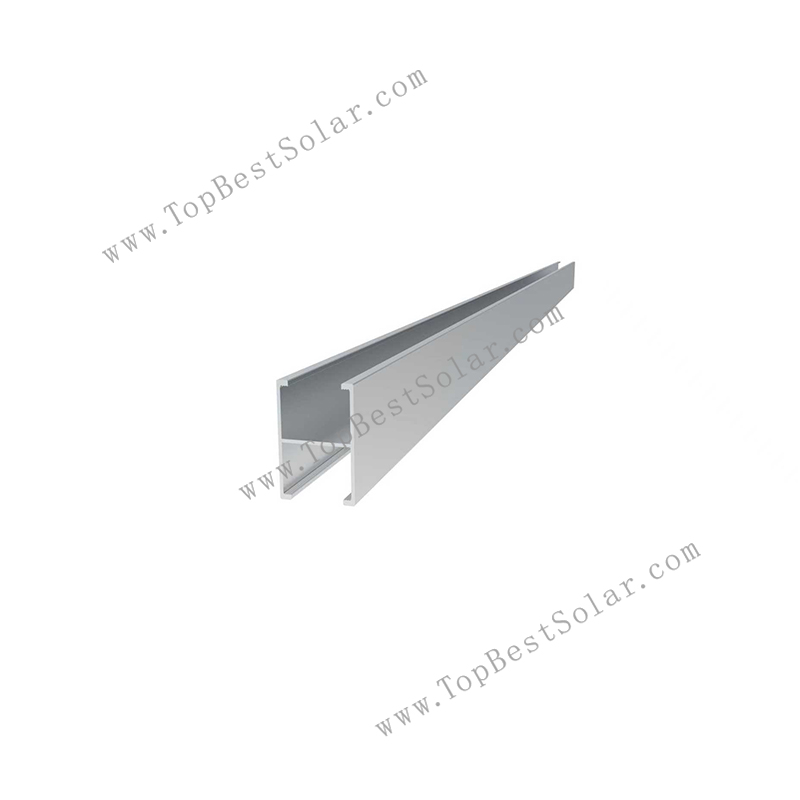
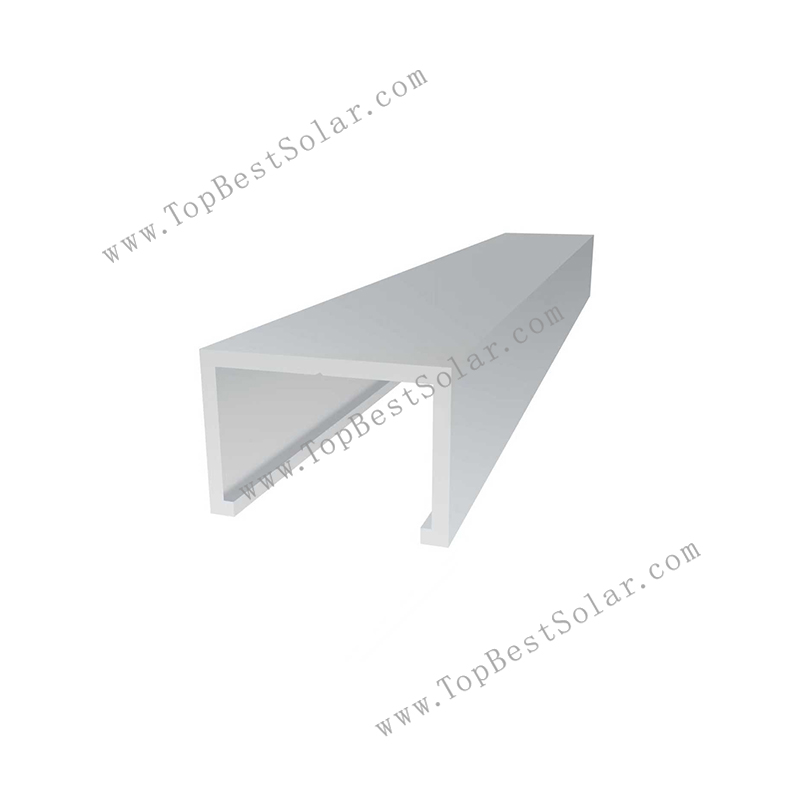
1. Solar Hook
2. Mid Clamp
3. End Clamp
4. Rail Splice
5. H Rail
A durable, high-quality tile roof solar mounting solution made of stainless steel and aluminum. It features easy installation with pre-assembled parts, ideal for rooftop solar projects.
Welcome to get more details of our system for your renewable energy project from http://TopBestSolar.com
- Prepare all necessary tools for solar installation, including the following items:
Marker pen
Wrench / electric screwdriver wrench
Tape
Allen key wrench
Line
Cutting machine
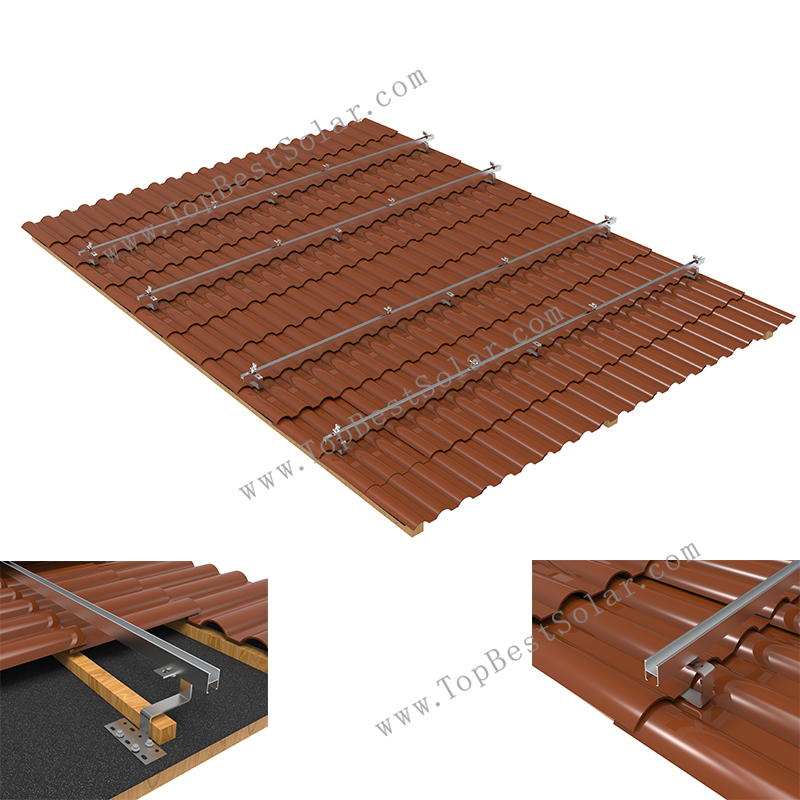
Laser rangefinder - Locate the hook installation points in strict accordance with the construction drawings. Remove the tiles first, then use an electric wrench to fasten the hooks firmly onto the wooden beams.
- Install the rest of the hooks as required by the scheme.
- Secure the mounting rails with M8×25 bolts and other matching fasteners.
- When the rails need to be joined, they should be fixed by using rail connectors.
- Mount mid clamps and end clamps onto the installed rails.
- Tighten all relevant bolts to fix the solar panels stably, and the entire installation work is completed.
- Description
-
Product Description:
This system is tailored for tile roofs. SUS304 hook with aluminum H rail, which is primarily used to secure solar panel, ensuring stable installation on tile roof.
Made from SUS304 and aluminum material, this system has superior corrosion resistance and high strength. Featuring flexible installation, it can be quickly assembled via bolt connection without the need for drilling or welding, thus avoiding any damage to the roof structure.
Features of Solar Panel Roof Mounting System:
1) Universal used for tile roof
2) Easy operation and installation with pre-assembled packing.
3) Qualty guarantee with good quallty SUS304 material.
Components for Solar Panel Roof Mounting System:
1. Solar Hook
2. Mid Clamp
3. End Clamp
4. Rail Splice
5. H RailA durable, high-quality tile roof solar mounting solution made of stainless steel and aluminum. It features easy installation with pre-assembled parts, ideal for rooftop solar projects.
Welcome to get more details of our system for your renewable energy project from http://TopBestSolar.com
- Installation Step
-
- Prepare all necessary tools for solar installation, including the following items:
Marker pen
Wrench / electric screwdriver wrench
Tape
Allen key wrench
Line
Cutting machine
Laser rangefinder - Locate the hook installation points in strict accordance with the construction drawings. Remove the tiles first, then use an electric wrench to fasten the hooks firmly onto the wooden beams.
- Install the rest of the hooks as required by the scheme.
- Secure the mounting rails with M8×25 bolts and other matching fasteners.
- When the rails need to be joined, they should be fixed by using rail connectors.
- Mount mid clamps and end clamps onto the installed rails.
- Tighten all relevant bolts to fix the solar panels stably, and the entire installation work is completed.
- Prepare all necessary tools for solar installation, including the following items:
- Leave Message
-